
A mid-sized city can run 20,000 streetlights every night. Each one draws power. Each one needs crews, trucks, and spare parts. Those bills never stop.
So why are more cities choosing LED street lights over traditional street lights? I have worked on many street lighting retrofits, and the answer goes beyond a lower power bill.
LED wins on lifetime cost, smarter control, and better light quality. Energy savings are just the start.
This guide will help you decide if switching makes sense, how to pick the right fixtures, and which common mistakes to avoid.
What Counts as LED vs Traditional Street Lights
Before we compare costs or light quality, we need to agree on what we’re comparing. I see a lot of confusion here, so let’s keep it simple.
LED street lights use light-emitting diodes to make light. A driver manages the power, and built-in optics aim the light at the road. Most retrofit projects install complete LED street light fixtures rather than simply swapping bulbs.
Traditional street lights usually means high-intensity discharge (HID) lamps. Three types show up most often:
- High-pressure sodium (HPS): the familiar orange-yellow glow on most roads
- Metal halide: whiter light, common in parking lots and commercial zones
- Mercury vapor: an older technology that many regions have already phased out
So why does HPS take center stage? It’s what most cities actually have on their poles. When I review a city’s lighting inventory, HPS usually covers the bulk of main roads and residential streets.
That makes HPS the realistic baseline. Comparing LED to mercury vapor would make LED look great. But that comparison wouldn’t match the real choice most cities face.
Throughout this article, “traditional” mainly means HPS. I’ll point out metal halide where it changes the picture.
Why Cities Switch: Where LED Delivers the Biggest Real-World Gains
When a city asks me whether LED is worth it, I don’t start with brochures. I start with three practical questions: What does it cost to run? What does it cost to keep running? And how much control do you get? LED pulls ahead on all three.
Lower Energy Use
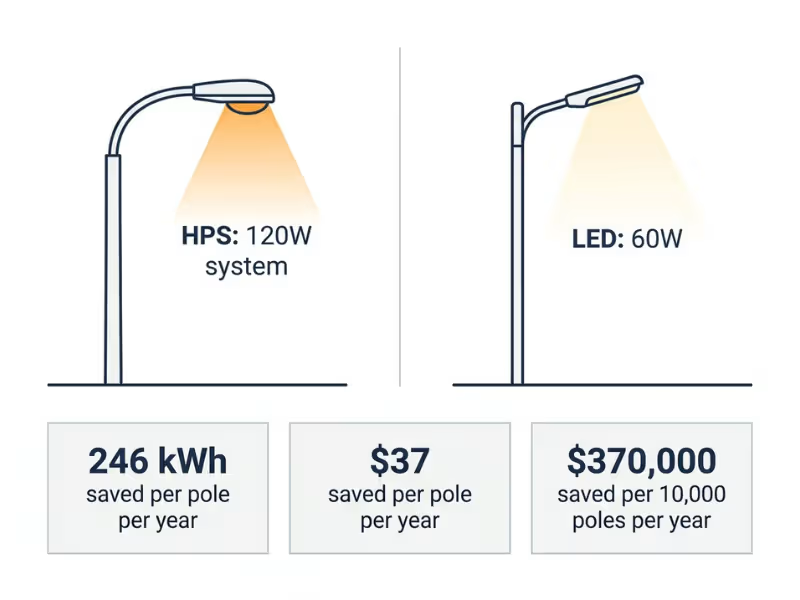
Here’s a common swap I see on residential streets. A 100W HPS lamp actually pulls about 120W once you add the ballast. A well-designed LED fixture often lights the same road with 50–60W.
That gap of 60 watts looks small on paper. But streetlights don’t work like office lights. They run from dusk to dawn, every single night, all year.
That adds up to about 4,100 hours of runtime a year. Let’s run the numbers:
- 60W saved × 4,100 hours = about 246 kWh per pole, per year
- At $0.15 per kWh, that’s roughly $37 per pole
- Across 10,000 poles, the city saves about $370,000 every year
And those savings repeat. Over a 15-year fixture life, that same city keeps over $5 million in its budget.
This is why I tell clients to stop thinking about watts per fixture alone. Multiply those watts by every pole, every night, every year. Streetlights rank among the longest-running equipment a city owns, so even modest efficiency gains grow into serious money.
Fewer Truck Rolls, Lower Maintenance Costs
Energy savings get the headlines. But when I talk with public works directors, maintenance often worries them more.
HPS lamps typically last four to six years. Ballasts and photocells fail on their own schedules. Near the end of their life, many HPS lamps start “cycling,” which means they flicker on and off. Residents call in complaints, and crews head out again.
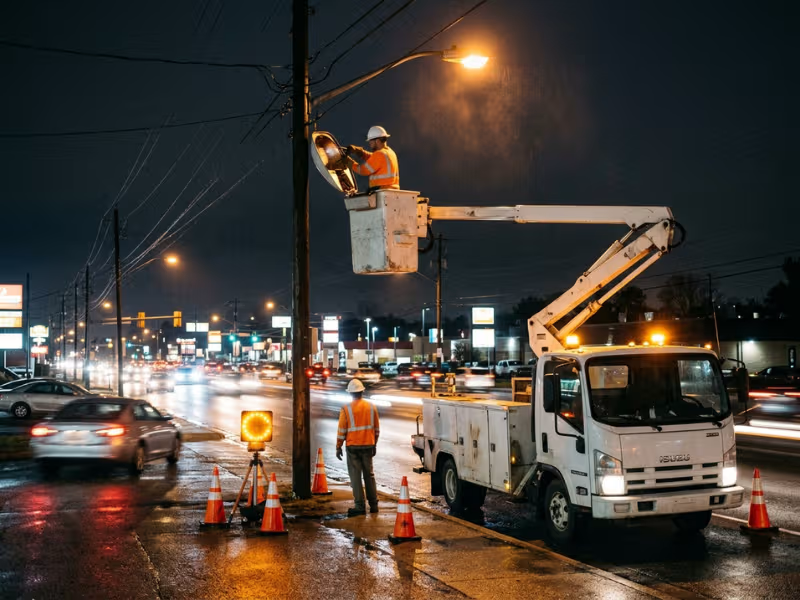
Every repair trip costs real money. You need a bucket truck, a two-person crew, traffic control on busy roads, and the part itself. In many cities, one service visit easily runs $150 to $300.
Quality LED fixtures change that pattern. Most carry ratings of 50,000 to 100,000 hours. No bulbs need regular replacement, and no ballast sits inside waiting to fail. Crews can go 10 to 15 years without touching many poles.
What does that mean in practice? I’ve watched maintenance teams shift from constant reactive repairs to planned work. They spend less time chasing outages and more time on other city assets.
For many cities, the maintenance savings match or even beat the electricity savings. So always count both when you build your business case.
Better Control Over Where and When Light Goes
This is the advantage I find most underrated. LED doesn’t just make light more cheaply. It lets you manage light with precision.
Directional optics. An HPS lamp shines in all directions, and a reflector tries to push the light downward. LED fixtures use built-in lenses to place light right on the road and sidewalk. Less light goes into the sky, yards, or bedroom windows.
Dimming. Most LED fixtures support dimming through standard 0–10V drivers or control sockets like NEMA 7-pin and Zhaga. A quiet residential street might drop to 50% output after midnight. That cuts energy use even further and reduces light at home windows.
Instant-on. HPS lamps need several minutes to warm up. After a power blip, they often need extra time to cool down and restrike. LEDs reach full brightness the moment power returns. That matters during storms and outages.
Zone-by-zone management. Different roads need different lighting. I usually help cities sort streets into groups:
- Main arterials: higher output, wider distribution, full brightness all night
- Residential streets: warmer color, lower output, scheduled dimming
- Pedestrian zones and crosswalks: focused light on people and curbs
With HPS, you get one lamp type and one light level. With LED, you can tune each zone to fit how people actually use it.
That’s why I see LED as a better operating platform for public lighting, not just a newer bulb.
Cost Comparison: Upfront Price vs Lifetime Value
Almost every budget meeting I join hits the same wall. Someone holds up a quote and points out that LED costs far more per fixture. They’re right. But the purchase price tells only a small part of the story.
Let’s look at both sides. Then I’ll show you how to run the numbers yourself.
Why LED Costs More at the Start
A replacement HPS lamp often costs $15 to $30. A quality LED street light fixture can run $150 to $400 or more. That gap shocks people.
The extra cost comes from what’s inside. An LED fixture is a complete system, not a bulb. It includes:
- LED chips
- An electronic driver
- A heat sink
- Precision optics
- Surge protection
If you want dimming or remote monitoring, you’ll add a control-ready driver, a 7-pin socket, and a photocell or control node.
Installation adds more. Most retrofits replace the entire fixture. That means bucket trucks, crews, traffic control on busy roads, and sometimes new mounting adapters or wiring repairs. You may also pay for a lighting audit, a photometric design, and proper disposal of the old lamps.
On many projects I review, the full installed cost lands somewhere between $300 and $800 per pole.
Why the Math Usually Changes Over Time
Here’s the shift I ask every client to make. Stop asking “What does the fixture cost?” Start asking “What does this pole cost us over 15 years?”
That’s total cost of ownership. It brings together four things:
- Electricity: what the light draws every night for its whole life
- Maintenance: lamp swaps, ballast repairs, photocell failures, and truck rolls
- Failure rate: how often lights go dark and trigger complaints
- Lifespan: how many times you’ll buy and install replacements
Let’s compare one residential pole over 15 years. The example uses 4,100 hours a year and $0.15 per kWh.
|
Cost Item |
HPS (Keep Existing) |
LED (Retrofit) |
|---|---|---|
|
Upfront cost |
$0 |
~$500 |
|
Energy (120W vs 60W) |
~$1,110 |
~$555 |
|
Maintenance |
~$900 |
~$225 |
|
15-year total |
~$2,010 |
~$1,280 |
The “free” option ends up costing more. It just spreads the bill across 15 years.
One warning: cheap LED fixtures break this math. Low-grade drivers fail early, and every failure brings back the truck rolls you hoped to avoid. Your lifecycle numbers only hold if the hardware holds.
A Simple Payback Framework
You don’t need a consultant to get a first estimate. Gather these six inputs:
- Number of existing fixtures. Count them by type and wattage, not just the total.
- Current system wattage. Include ballast losses. A 100W HPS lamp actually draws about 120W.
- Annual runtime hours. Dusk-to-dawn lighting usually runs 4,000 to 4,300 hours.
- Local electricity rate. Check your tariff closely. Some utilities bill streetlights at a flat rate per fixture. Confirm that the rate drops when wattage drops.
- Annual maintenance cost. Add parts, labor, trucks, and traffic control. Divide by fixture count.
- Projected LED wattage and lifespan. Use the manufacturer’s tested data, including the L70 rating and warranty term.
Then plug them in:
- Annual energy savings = (old W − new W) × hours × rate ÷ 1,000 × fixtures
- Annual maintenance savings = old maintenance cost − projected LED maintenance cost
- Simple payback = total project cost ÷ (energy savings + maintenance savings)
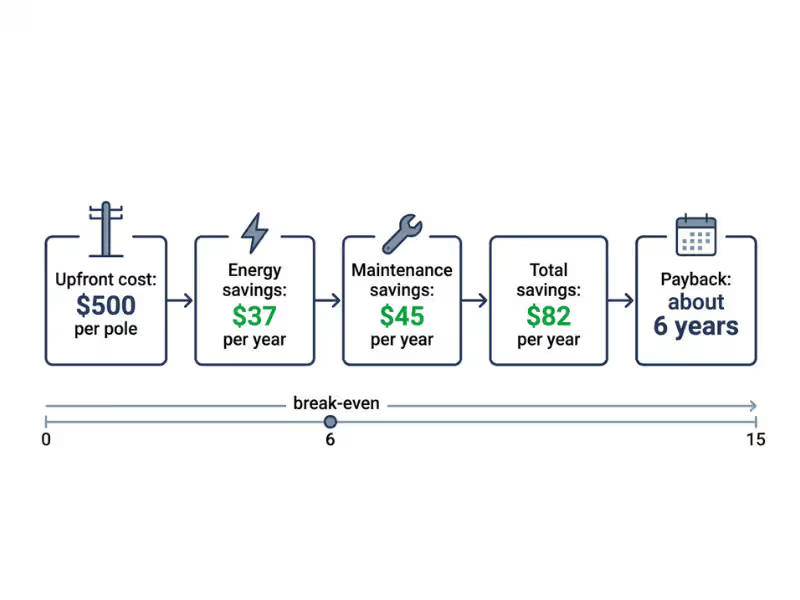
Using our example pole, you save about $37 in energy and $45 in maintenance each year. That totals $82. Divide $500 by $82, and you get a payback of roughly six years.
Now compare that against the fixture’s expected life. If payback lands well inside the warranty period, the project looks strong. Subtract any utility rebates first. They can cut payback by a year or more.
When the Switch Makes the Most Financial Sense
Some projects pay back much faster than others. I see the quickest returns when these conditions line up:
- Long runtime hours. All-night roads beat part-night ones. Underpasses and tunnels that stay lit around the clock pay back fastest.
- High electricity rates. Every extra cent per kWh shortens payback.
- High maintenance costs. Busy arterials that need traffic control for every repair benefit most.
- Aging fixtures. If your HPS heads already fail often, you’ll spend money on them soon anyway.
- Large-scale retrofits. Bulk orders lower fixture prices. One crew mobilization covers hundreds of poles, which drops your per-pole labor cost.
If only one or two of these apply, don’t stall. Phase the work instead. Start with high-wattage arterials, where savings per pole run highest.
Light Quality: Why Brighter Isn’t Always Better
LED can make a street far easier to see. It can also make it feel like a parking garage at 2 a.m. I’ve seen both results in the same city, sometimes one block apart. The difference rarely comes from the LED chip itself. It comes from the design choices behind it.
Let’s start with what LED gets right. Then we’ll look at where projects go wrong and what you should aim for instead.
Why LEDs Often Improve Visibility
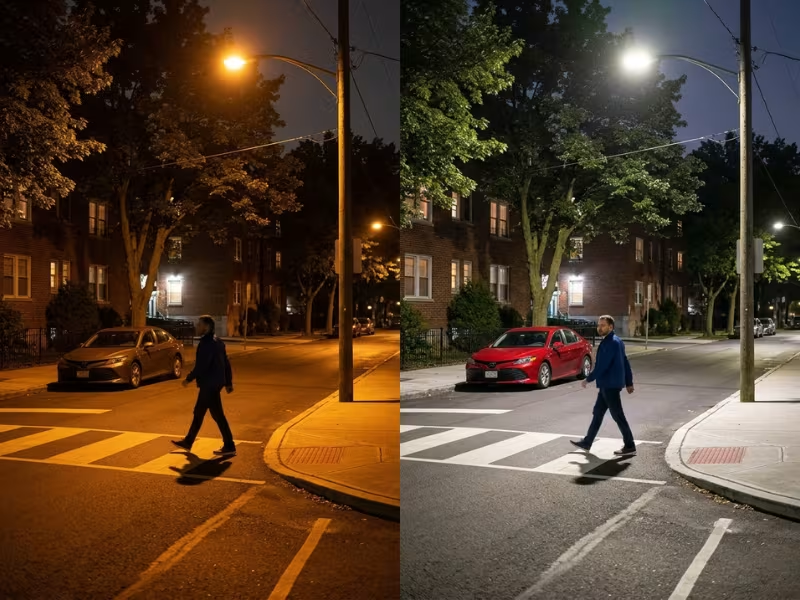
HPS lamps have a color rendering index (CRI) of roughly 20 to 25. Under that orange glow, almost everything looks the same color. A red car looks brown. A navy jacket blends into dark asphalt.
Most LED street lights reach a CRI of 70 or higher, and many hit 80. Colors look much closer to how they do in daylight. That helps drivers separate objects from the background faster.
Our eyes also work differently at night. In low light, they respond better to white light than to orange light. So drivers often notice movement at the edge of the road sooner under LED.
You’ll see the biggest gains in a few places:
- Crosswalks: Drivers can pick out a pedestrian’s outline and clothing, not just a dark shape.
- Intersections: Lane markings, curbs, and signs stand out more clearly.
- Bus stops: Riders can see faces, which makes waiting at night feel safer.
One tip I give every client: check vertical light at crosswalks, not just pavement brightness. A bright road with a dimly lit pedestrian still creates risk.
Better color plus better aim means faster recognition. That’s the real visibility win.
Why Some LED Street Lights Feel Harsh
Residents rarely complain about LED as a technology. They complain about specific choices. I usually trace harsh lighting back to four causes.
Color temperature set too high. Many early retrofits used 5000K to 6000K fixtures because they cost less and ran slightly more efficiently. The result looked cold and blue. Today, the efficiency gap between 3000K and 4000K is small, often 5% or less. You don’t need to trade comfort for savings.
Poor optics. Cheap fixtures often use wide, basic lenses. Light spills into bedroom windows and backyards instead of staying on the road.
Too much light. Teams often match an LED fixture to the old HPS lamp lumen for lumen. But LED places light more precisely on the road, so it needs fewer lumens to light the same street. One-for-one matching leaves the street overlit.
Weak glare control. LED chips form small, intense points of light. If drivers can look straight into exposed chips, they feel discomfort glare. Check the fixture’s BUG rating and choose a low “G” value, especially on residential streets.
Watch for this pattern: a bright, cold, glary street almost always points to a spec problem, not an LED problem.
What Cities Should Actually Optimize For
The goal isn’t the whitest light or the highest brightness. Aim for four things: people see clearly, light stays comfortable, glare stays low, and light stays where you need it.
Different zones need different settings. Here’s how I usually break it down:
- Residential streets: Use 2700K to 3000K. Keep light levels near the low end of recommended ranges. Add house-side shields where poles sit close to homes. Dim 30% to 50% after midnight.
- Main arterials: Use 3000K to 4000K. Put uniformity first, so drivers don’t pass through bright and dark patches. Keep glare ratings low and run full output during peak traffic.
- Commercial and downtown areas: Use 3000K to 4000K with CRI 80 or higher. Focus on vertical light that reaches faces, storefronts, and sidewalks.
- Parks and dark-sky zones: Use 2700K or warmer. Choose fixtures with zero uplight.
Before you approve any fixture, ask the vendor for a photometric layout of your actual street. Catalog drawings won’t show how light falls on your pole spacing and mounting height.
Then test a pilot block. Walk it at night with a few residents and a traffic engineer. You’ll learn more in one hour than from any spec sheet.
Here’s what to remember: good LED lighting comes from the right color temperature, optics, shielding, and controls, not from more lumens.
Environmental Impact: More Than Just Energy Savings
Many proposals I review call LED “green” and stop there. That word alone won’t help a council vote or a sustainability report. What helps is knowing exactly where the environmental gains come from and where they can slip away.
Let’s look at both sides: the emissions you can measure, and the trade-offs that depend on your choices.
Lower Electricity Use and Emissions
Every kilowatt-hour you don’t use is carbon your grid doesn’t emit. The math works like this.
Go back to our 10,000-pole example. Each pole saves about 246 kWh a year, so the city cuts roughly 2.46 million kWh. On a grid that emits about 0.4 kg of CO₂ per kWh, that comes to nearly 1,000 metric tons of CO₂ avoided every year. Scheduled dimming pushes that figure higher.
Why does this matter to a city? Streetlights often rank among the largest items on a municipal electricity bill. That makes them one of the fastest ways to cut Scope 2 emissions, the emissions tied to purchased power.
I tell sustainability teams to treat a retrofit as a measurable climate project:
- Get your grid’s emission factor from your utility or national energy agency.
- Multiply it by your projected kWh savings to set a clear reduction target.
- Track actual meter data after installation and report real results.
One caveat: a cleaner grid means smaller carbon gains per kWh. On a coal-heavy grid, the same retrofit delivers a much bigger cut.
Disposal, Mercury, and Light Pollution
Here’s where honest planning matters.
Mercury vapor lamps contain mercury, a toxic metal. Metal halide lamps and most HPS lamps also hold smaller amounts. Every lamp you remove needs proper hazardous-waste recycling, not a landfill. Build that cost and process into your project plan from day one.
LEDs don’t use mercury to make light. But they still create electronic waste. Drivers, circuit boards, and surge protectors all reach end of life eventually. Ask vendors for recyclable aluminum housings and replaceable drivers, so you can repair a fixture instead of scrapping it.
Light pollution is the bigger risk. A badly specified LED can do more harm than the HPS lamp it replaced. High color temperatures like 5000K emit more blue light, which scatters across the night sky and brightens skyglow. Blue-rich light also disrupts insects, migrating birds, and nesting sea turtles. Poor optics then send that light into yards, trees, and the sky.
You can avoid most of this with a few choices:
- Use 3000K or warmer in most areas
- Choose full-cutoff fixtures with zero uplight
- Dim lights during late-night hours
So LED doesn’t come with built-in eco credentials. You earn the environmental benefit through smart design and careful management.
Common Concerns: Where LED Projects Go Wrong
Most LED projects don’t fail because of the technology. They stall because of a few objections that nobody answered early. Here are the four I hear most often, and how I respond to each one.
“The Light Feels Too Blue”
This complaint is valid. Residents aren’t imagining it.
The cause is almost always color temperature. Many early retrofits installed 5000K to 6000K fixtures. On a quiet street at night, that light looks cold and clinical. People compare it to a hospital hallway.
The LED chip doesn’t create this problem. The person who wrote the spec does. LED fixtures come in a wide range of color temperatures, from warm 2200K to cool 6500K. You choose the number.
Here’s the guidance I give cities:
- Residential streets: 2700K to 3000K
- Main roads and commercial areas: 3000K to 4000K
- Avoid 5000K and above for general street lighting
Put the color temperature in writing in your bid documents. If you leave it open, some vendors will default to their cheapest cool-white stock.
Already installed cool fixtures? You don’t always need new heads. Some models let you swap the light module or add a warmer optic. Ask your supplier before you plan a full replacement.
Before any large order, install three or four sample fixtures on a real street. Invite residents to walk the block at night. You’ll catch color problems before you buy 5,000 of them.
“The Upfront Cost Is Too High”
When a council member says this, I ask one question: “Too high for this year’s budget, or too high over the life of the project?”
Those are two different problems. Budget pressure is a cash-flow issue. Long-term cost is a value issue. LED usually wins on value. The real hurdle is finding the cash.
You have several practical ways to bridge that gap:
- Utility rebates. Many utilities pay $50 to $150 per fixture for LED upgrades. Check before you finalize your budget.
- Energy savings performance contracts. A contractor funds the upgrade, and the city repays it from the savings.
- Low-interest financing. Green bonds, state energy loans, and on-bill financing spread the cost over several years.
- Phased rollouts. Start with high-wattage arterials. Their savings can help fund the residential phase.
With the right structure, annual savings can cover most or all of the yearly payment. Your budget stays steady from day one.
“Do LEDs Really Last That Long?”
Spec sheets often promise 100,000 hours. That number deserves some scrutiny.
Lab ratings like L70 measure when the LED chips drop to 70% of their original light output. Testers run them under controlled temperatures. But your fixture lives on a pole, through summer heat, winter storms, and power surges.
In the field, the chips rarely fail first. Other parts do:
- Drivers. These handle the power, and they usually fail before anything else. Ask for the driver’s rated life at your local maximum temperature, not at room temperature.
- Heat management. Heat shortens LED life. Look for a solid aluminum heat sink with open fins. A sealed plastic housing traps heat.
- Surge protection. Lightning and grid spikes kill drivers. I recommend at least 10kV surge protection, and 20kV in storm-prone areas.
- Environment. Coastal salt air, desert heat, and heavy dust all wear fixtures down. Choose IP66 or higher, with corrosion-resistant coatings near the sea.
Then check the warranty carefully. A strong one covers the whole fixture, including the driver, for at least 10 years.
One more tip: ask vendors for field failure rates from projects at least five years old. Lab data tells you what a fixture can do. Field data shows what it actually does.
“Can LEDs Increase Glare or Affect Wildlife?”
Yes, they can. But neither outcome is inevitable, and you can control both.
Glare comes from small, intense points of light. If a driver or pedestrian can see the exposed LED chips, the light feels harsh. Wildlife problems come mostly from blue-rich light and light that spills where it doesn’t belong. Insects swarm to it. Migrating birds lose their way. Sea turtle hatchlings crawl toward the road instead of the ocean.
Here’s how I help cities manage both risks:
- Pick warmer color temperatures. Use 3000K or lower in most areas. Near wetlands, parks, or turtle nesting beaches, consider 2200K or amber LEDs.
- Use full-cutoff optics. Choose fixtures with a BUG rating of U0, which means zero uplight. Keep the “G” value low on residential streets.
- Mount fixtures flat. A tilted head throws light toward the horizon. Set it at zero degrees.
- Add house-side shields. These block light from reaching bedroom windows and backyards.
- Dim late at night. Cut output by 30% to 50% after midnight on quiet streets.
Match each design to its setting. A busy downtown intersection and a road beside a nature reserve shouldn’t get the same fixture.
Done well, LED actually cuts glare and light trespass compared to old HPS cobra heads, which scatter light in every direction.
How to Evaluate a Street Light Conversion Project
A good LED project starts with good data, long before anyone opens a product catalog. The cities I see succeed answer a few basic questions first. Then they judge fixtures against clear standards instead of sales pitches.
Five Baseline Questions to Ask First
Your answers to these five questions shape every number in your business case.
- How many fixtures do you actually have?
Count them by type, wattage, mounting height, and owner. Some poles belong to the city, while the utility owns and bills others. In my experience, inventory records often drift 10% to 20% from what’s really on the street. A quick field audit pays for itself. - What’s your current wattage and annual runtime?
Use system watts, not lamp watts. A 250W HPS lamp draws closer to 290W with its ballast. Then confirm runtime. Dusk-to-dawn lights run about 4,100 hours a year, but part-night circuits run much less. Also check whether your streetlights are metered or billed at a flat rate. - What do you spend on maintenance each year?
Pull contractor invoices, crew hours, truck costs, and outage complaints. Divide the total by your fixture count. That cost per pole becomes one of your strongest savings numbers. - Which roads need attention first?
Look for high-wattage arterials, intersections with high crash rates, school zones, and areas where fixtures fail often. These spots usually deliver the fastest payback and the most visible safety gains. - What local rules apply?
Check dark-sky ordinances, color temperature caps, glare limits, and your utility’s approved product list. Many regions now limit residential lighting to 3000K or lower. If you find these rules early, you won’t have to rewrite your bid later.
What to Look for in Fixture Specifications
With your baseline set, you can compare LED street light specifications with a clear eye. Here’s how I separate a solid spec sheet from a weak one.
Wattage and efficacy (lm/W). Look at delivered lumens per watt for the whole fixture, not chip-level numbers. Good roadway fixtures today reach 130 to 160 lm/W or more. Anything under 100 lm/W is outdated. Ask for an independent LM-79 test report to back the claim.
Color temperature. Specify 2700K to 3000K for residential streets and up to 4000K for arterials. Write the exact value into your bid. “Neutral white” leaves too much room for interpretation.
CRI. A CRI of 70 works for most roads. Choose 80 or higher for downtown streets and pedestrian zones. Paying extra for CRI 90 on a highway rarely makes sense.
Optics and cutoff. Ask for the IES distribution type, such as Type II for narrow residential streets or Type III for wider roads. Require a BUG rating of U0, which means zero uplight. Good suppliers offer several optic options, so you can match your actual pole spacing.
Dimming compatibility. Even if you don’t plan to add controls now, require a dimmable driver (0–10V or DALI) and a NEMA 7-pin or Zhaga socket. This adds little cost today and saves you from replacing fixtures later.
IP rating and durability. Look for these minimums:
- IP66 for dust and water protection
- IK08 or higher for impact resistance
- 10kV surge protection, or 20kV in storm-prone areas
- An operating temperature range that covers your local extremes
Warranty terms. A strong warranty covers the entire fixture, including the driver, for at least 10 years. Read the exclusions closely. Some warranties cover parts but not labor, which means the city still pays for the bucket truck.
One red flag deserves special attention. If a vendor can’t share test reports or field data from projects at least five years old, keep looking.
Should Cities Also Invest in Smart Controls?
After a city commits to LED, a vendor usually pitches a control system next. Sometimes that’s a smart move. Sometimes it’s an expensive add-on that nobody ends up using. Treat controls as an extra layer on top of a solid LED project, not the reason to do one.
Here’s what controls deliver and how I help cities decide when to add them.
What Controls Actually Add
Most networked systems use a small node that plugs into the 7-pin or Zhaga socket on each fixture. That node gives you three practical tools.
Dimming and scheduling. You can set light levels by street, hour, or season. A common profile runs full output until midnight, then drops to 50% until 5 a.m. On top of the LED savings, this often cuts another 20% to 40% of energy use.
Remote fault monitoring. The system flags dead lights, failing drivers, and unusual power draw. Crews know which pole to visit and which part to bring. You no longer wait for resident complaints to find outages.
Fixture-level energy data. Many nodes meter each light. Some utilities accept that data for billing, which can lower charges.
Why are controls usually the next step after LED? The LED fixture does the heavy lifting. It cuts roughly half the energy and most of the maintenance. Controls fine-tune what’s left. Their savings are real but smaller, so they matter most once efficient fixtures are already in place.
Bundle Now or Add Later?
Timing matters as much as the technology. Here’s the rule of thumb I use.
Bundle controls with the retrofit when:
- You manage large arterial networks where outages create safety or liability risks
- Your utility bills by metered use, so dimming directly lowers the bill
- Rebates or grants cover the control nodes
- Crews will already visit every pole, which saves a second trip
Phase them in later when:
- Your budget only covers fixtures
- Your utility charges a flat rate per fixture with no credit for dimming
- Your network is small and residents already report outages quickly
Nodes typically cost $50 to $150 each, plus software fees. Check those annual subscriptions closely. Over 15 years, they can quietly eat into your savings.
Either way, protect your options. Specify dimmable drivers and control-ready sockets on every fixture you buy. Then pilot a few hundred nodes in one district before you commit citywide. If the software feels clunky or the vendor locks you into proprietary hardware, you’ll find out at low cost.
Real-World Lessons from Street Light Retrofits
Every retrofit I’ve worked on taught me something new. Each city brings its own details, but the same patterns keep showing up. Here’s what the successful projects share, and where the struggling ones went wrong.
Start small, even when the plan is big. The smoothest large-scale projects I’ve seen began with a pilot of 50 to 200 fixtures. Pick a mix of streets: one arterial, one residential block, and one spot near homes or a park. Run it for at least a full season.
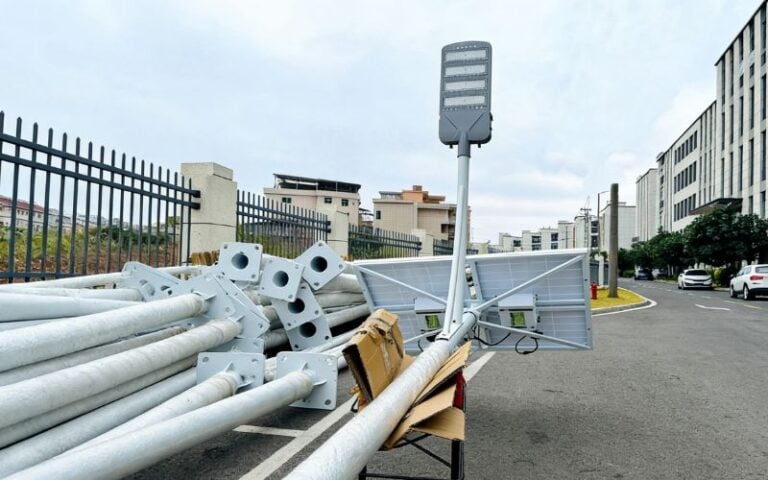
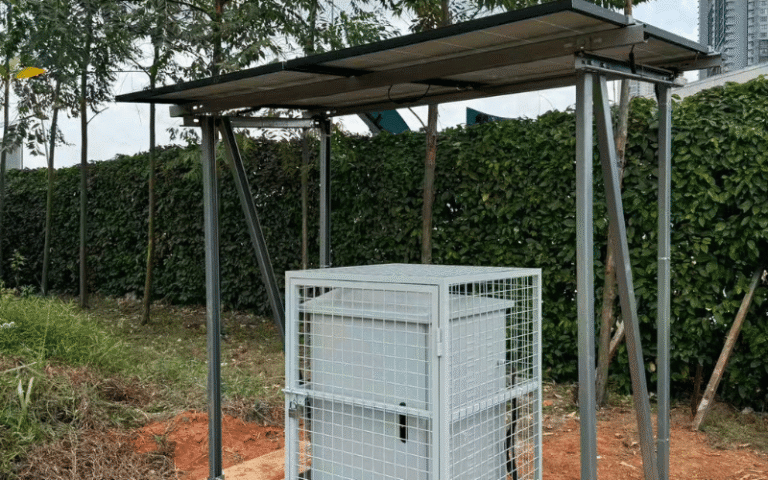
A pilot reveals what no spec sheet can. You’ll see how the optics behave on your actual pole spacing, whether the drivers survive your local surges, and how people react. You’ll also get real meter data to replace your estimates. If you want to see how this planning works on actual poles, a real solar LED streetlight retrofit project shows how target lux levels, mounting methods, and runtime goals shape the final design.
Residents talk about color and glare, not watts. When feedback comes in, it almost never mentions energy savings. People say the light looks “too blue,” shines into their bedroom, or stings their eyes while driving. Some cities learned this the hard way. They installed thousands of cool-white heads, then paid to replace them.
So gather feedback during the pilot, not after. Host a night walk, post a short online survey, and log every complaint by pole number. Most issues trace back to a fixable choice, like color temperature, fixture tilt, or a missing house-side shield.
Phase the rollout. Converting every pole at once sounds efficient. In practice, it concentrates your risk. If a batch of drivers fails or a supplier misses a delivery, the whole city feels it.
I usually recommend three or four phases, starting with high-wattage arterials where payback runs fastest. Each phase lets you refine specs, tighten installation checklists, and apply lessons before the next order. Savings from early phases can even help fund later ones.
Don’t chase brightness. This is the most common mistake I see, and one of the costliest to undo. Teams assume brighter means safer, so they choose fixtures with far more lumens than the street needs. The result is glare, harsh pools of light, and frustrated neighbors.
Good outcomes come from distribution: even light on the road and sidewalk, with little spill beyond it. Ask for photometric layouts of your real streets. Then judge success by how the street feels at night, not by how bright it looks on paper.
The cities that get it right treat residents as part of the design process. That one habit prevents most expensive fixes.
FAQ: LED Street Lights vs Traditional Street Lights
These are the questions I hear most often from public works teams, council members, and residents. Here are the short answers.
How much energy do LED street lights save?
Most cities cut streetlight energy use by 50% to 65% when they replace HPS with well-designed LED fixtures. Add scheduled dimming, and total savings can pass 70%.
One catch: if your utility bills streetlights at a flat rate per fixture, confirm that the tariff drops when wattage drops. Otherwise, you won’t see the savings on your bill.
How long do LED street lights last?
Quality fixtures carry L70 ratings of 50,000 to 100,000 hours. At about 4,100 hours a year, that’s 12 to 20+ years. HPS lamps usually last only four to six years.
The driver usually fails first, so ask for a warranty of at least 10 years that covers the whole fixture, including the driver.
Why do some LED street lights look blue or harsh?
The usual cause is a color temperature of 5000K or above. Overlighting and exposed LED chips make it worse.
The fix is in the spec:
- 2700K to 3000K for residential streets
- Up to 4000K for main arterials
- A low “G” value in the BUG rating
- Lumen levels sized to the street, not copied from the old HPS lamp
Are LED street lights bad for sleep or health?
The concern centers on blue light, which can suppress melatonin at night. Cool-white LEDs emit more of it than warm ones, which is why medical and lighting groups recommend 3000K or warmer outdoors.
Light trespass into bedrooms matters even more. Choose warm color temperatures near homes, add house-side shields, and dim 30% to 50% after midnight. Done well, LED often puts less light into bedrooms than old HPS cobra heads did.
How much does it cost to convert street lights to LED?
The full installed cost usually lands between $300 and $800 per pole, including the fixture, labor, trucks, traffic control, and lamp disposal. Smart control nodes add another $50 to $150 each.
Utility rebates of $50 to $150 per fixture can soften that number. Most projects pay back in about four to eight years.
Do LED street lights reduce light pollution?
They can, but not automatically. Full-cutoff LED fixtures with a U0 rating send almost no light upward, a big improvement over older HPS heads with drop lenses.
But cool-white light scatters more and adds to skyglow. To actually reduce light pollution, use 3000K or warmer, U0 optics, flat mounting, and late-night dimming.
Can LED street lights be dimmed remotely?
Yes. You need a dimmable driver (0–10V or DALI) and a networked control node in a NEMA 7-pin or Zhaga socket. Then you can set schedules by street, adjust light levels from software, and get fault alerts.
No network yet? Many drivers support preset dimming profiles programmed at the factory.
Conclusion: Switch Smarter, Not Just Sooner
LED being newer doesn’t settle anything. The question that matters is simpler. Can it give you a better balance of long-term cost, light quality, and control than what’s on your poles now?
In most cities I’ve worked with, the answer is yes. But only when someone makes good choices on color temperature, optics, and fixture quality.
So the debate has moved on. Most cities no longer ask whether to switch. They ask how to switch without paying for avoidable mistakes.
Here’s where I’d start. First, build your baseline: fixture count, system wattage, runtime, power rates, and maintenance cost per pole. Next, hold every fixture spec up against those numbers. Then run a pilot and listen to what residents and crews tell you.
Get those three steps right, and you can retrofit the rest of the city with confidence.