I have seen many beautiful garden lights that deserve an eco-friendly solar upgrade. Some people worry about wiring and weather-proofing. I understand these concerns and want to help.
You can add a solar kit with a panel, controller, and battery to your existing garden lights by bypassing the old AC wiring. Then match the LED’s voltage to the solar system’s output. That’s the main trick.
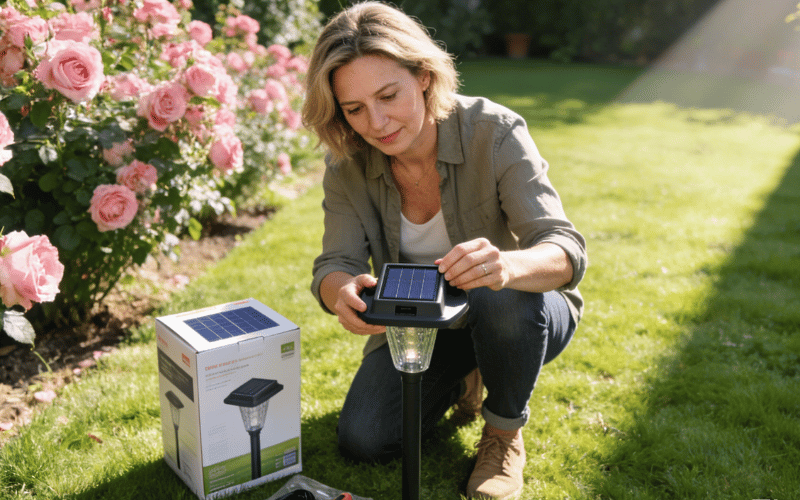
I love helping homeowners combine landscape aesthetics with modern solar technology. I have done this for many garden projects. Let me walk you through the process step by step.
What Are the Main Components of Solar Garden Lights?
I usually focus on four parts: the LED lamp, the solar panel, the battery, and the solar charge controller. These make or break the system.
An LED lamp requires direct current from a solar controller; the solar panel charges the battery, which stores energy for nighttime use. A charge controller manages it all.
I have spent over ten years working on outdoor solar lighting projects for homeowners. I now manage product development for a major lighting brand, where I handle customized solutions. I notice that many people ask about these core components, wondering how they fit together. In my experience, the LED lamp is often the easiest part to understand. But they also wonder about sizing the solar panel and battery, especially when converting older garden lights.
I like to point them to our guide: How Solar-Powered Garden Lights Work. That article helps understand how power flows from the sun to the battery, then to the LED lamp.
Here is a simple table that shows the four main components, their purpose, and the most important things to check:
|
Component |
Purpose |
Key Consideration |
|---|---|---|
|
LED Lamp |
Illuminates the area |
Voltage compatibility with the solar controller |
|
Solar Panel |
Collects sunlight and generates power |
Wattage rating and angle of installation |
|
Battery |
Stores power for night use |
Capacity and lifespan |
|
Solar Controller |
Regulates charging and discharging |
Matches battery and LED voltage requirements |
When I design solar conversion kits, I start by clarifying these components. For existing garden lights, you keep the fixture head (the decorative part), but you usually remove the existing AC power supply. Instead, you use a DC-compatible bulb if the fixture uses standard sockets. In many cases, older fixtures might have low-voltage halogen bulbs or even line-voltage incandescent lamps. Then the big question is whether you can convert them to modern DC-powered LED bulbs.

I often recommend a quick evaluation of the existing bulb socket or switching it to a DC-friendly alternative. Once that is sorted, we finalize the solar panel wattage, the battery capacity, and pick a suitable solar charge controller. Over hundreds of projects, I have found that people need a clear layout of the parts. When they understand how these parts interact, they feel confident about upgrading their garden lights to a greener and more independent power source.
How to Calculate Solar Panel Power and Battery Capacity for Garden Lights
I like to confirm the LED wattage and desired runtime first. That is the main factor in sizing solar panels and batteries.
We usually check the total power of the LED bulbs and whether they will run all night. For instance, a set of 10W garden lights running for 8 hours often needs a 20-25W solar panel and around a 100Wh battery.
When I talk with homeowners, I always ask for key details. For example, if a garden light system uses 10W at full brightness but only needs to run for six hours, its daily energy consumption is lower than that of a system running for twelve hours. This reduces the required solar panel size and battery capacity. If the garden lights stay on at full 10W all night, then the solar panel and battery must be larger.
Below is a table that shows how I typically compare LED wattage and battery capacity. The numbers are approximate, but they give a clear framework:
|
Total LED Power |
Desired Runtime |
Recommended Solar Panel (W) |
Recommended Battery (Wh) |
Estimated Backup Time |
|---|---|---|---|---|
|
10W |
6 Hours/Night |
20 – 25W |
~100Wh |
1-2 nights |
|
10W |
12 Hours/Night |
30 – 40W |
~150Wh |
1 night |
|
5W |
6 Hours/Night |
10 – 15W |
~50Wh |
1-2 nights |
|
5W |
12 Hours/Night |
20 – 25W |
~80Wh |
1 night |
I usually like to explain that if you keep the same LED wattage but want a longer lighting duration, you must increase both the solar panel rating and the battery capacity. Some homeowners need their lights to stay on for up to 12 hours per night in the winter, while others only need six hours of operation. This variation significantly impacts the recommended system size.
I recall one project in a northern region where sunlight was less intense and winter nights were long. We needed a bigger panel and a larger battery to guarantee reliable performance for their pathway lights. These details show why it’s essential to calculate the daily watt-hour consumption. Then I match that to the solar panel’s expected daily generation and the battery’s storage capacity. This approach ensures the system has enough surplus capacity to handle cloudy days.
I encourage people to share data about local sunshine hours, desired runtime, and typical weather patterns. With all this, I can suggest the best system design. The more accurate the data, the more precise the final configuration. People sometimes worry about cost, but I remind them that an underpowered system will cause early shutdowns at night. That leads to frustration and additional costs. So I always aim for a stable margin of safety.
How to Confirm That Existing Garden Lights Are Compatible with Solar Systems
I tell homeowners to check the light bulb or fixture. Many older garden lights use low-voltage AC transformers that do not work with solar DC systems.
I remove the AC transformer and connect the light fixtures to a low-voltage DC power source. Then I confirm that the LED voltage matches the solar controller output.
In my experience, most low-voltage LED garden lights can be adapted to DC input with minimal changes. However, I have come across fixtures that require a new bulb or even a new socket. This is especially true for ancient designs that run on 120V AC. When the power source is a separate plug-in transformer, it is usually enough to disconnect that transformer and wire the lights directly to a solar controller.
Some solar controllers deliver 12V DC, while others can output different voltages depending on the design. Many low-voltage LED bulbs can accept a wide range of DC input, but it is best to verify the specs. If your bulb cannot handle the typical output from a solar controller, you must change it.
I recall a fascinating project in which the client had a set of brass path lights with a beautiful aged patina. They wanted to keep the original look, so they replaced the halogen bulbs with new 12V DC LED bulbs that fit into the old sockets. We installed a solar charge controller designed for 12V output, and everything worked well.
Sometimes, people question whether it is worth the effort. I tell them that if the fixture is high-quality or has sentimental value, it is definitely worth upgrading to solar. You preserve the charm while adding sustainability. For simpler or mass-produced garden lights, it might be cheaper to buy a new integrated solar light. But when we are dealing with premium fixtures, the aesthetic value is higher.
Here is a small table that shows the common steps I recommend for checking compatibility:
|
Step |
Action to Take |
|---|---|
|
Check Voltage Requirements |
Identify the input voltage for the existing bulbs |
|
Remove/Bypass AC Transformer |
Disconnect the old transformer from the circuit |
|
Verify DC Compatibility |
Ensure the bulbs can handle 12V DC |
|
Install/Replace Bulb if Needed |
Match the new DC bulb to the solar controller output |
|
Test on Low-Voltage DC |
Confirm stable lighting performance |
I always say that the final check is a test run on a low-voltage DC power supply in the garage. If everything lights up correctly and the brightness is stable, then the garden lights are compatible. That is when we install the actual solar system components in the yard.
How to Install the Solar Panel for Garden Lights
I suggest placing the solar panel in a sunny spot, such as on a roof or a dedicated post. The bracket should fit the mounting surface and the panel size.
A stable, angled bracket ensures the panel receives enough sunlight throughout the day. This bracket must stand up to wind and weather.
I usually recommend a standard adjustable bracket that attaches securely to the chosen surface. I look at the available space, potential obstructions, and the strength of the mounting point. If a roof is not available, I might suggest a ground-mount stake or a small post to hold the solar panel at an optimal tilt. An angle between 30° and 45° is typical for many regions, but it depends on local latitude.
Some people overlook the importance of exposure to clear sunlight. If there are tall trees, buildings, or even patio umbrellas, the panel may not generate enough power. I always walk around the yard or look at pictures to spot potential shading issues.
For larger garden lighting systems, I recommend a sun path analysis. That helps us decide on the orientation and the best mounting location. In windy regions, the mounting must withstand strong gusts. We can use heavy-duty hardware or add extra support.
I also pay attention to the cable routing from the panel to the controller. We protect cables by burying them in a shallow trench or using UV-resistant conduits. A neat installation keeps the system safe and looks professional. It also helps with future maintenance.
Here is an example table that compares two basic mounting options:
|
Bracket Design |
Pros |
Cons |
|---|---|---|
|
Roof-Mount |
Maximum sunlight exposure |
May require more complex wiring runs |
|
Ground-Mount |
Easier to install and maintain |
Possible shading from plants or structures |
I usually prefer ground-mount brackets for garden light conversions. This keeps the installation simple while making the solar panel less intrusive. But that choice also depends on your garden layout and the amount of available sunlight. Sometimes you cannot place the panel on the ground without it being in the way. In that case, we try a roof-mount or wall-mount. The goal is to keep everything practical, safe, and visually appealing.
When Will Every Garden Light Be Solar Powered?
I am optimistic about the future of solar garden lights. But not every yard has enough sunlight or the proper budget to switch right now.
High upfront costs, variable sunlight hours, and cold climates can limit solar adoption. If you want more details, check out “Where Is The Best Place To Install Solar Garden Lights?“
Over the years, I have seen many homeowners and landscape designers excited about going solar. But a few factors still hold them back. One factor is the initial investment. Although solar kits save money on electricity bills, the upfront cost is higher than just wiring a simple low-voltage AC landscape light. Another factor is geography. Some areas have long winter seasons with limited sunlight, so they need larger batteries or higher-capacity panels to keep the lights on during cloudy days. That can push up the cost.
I encourage homeowners to carefully evaluate their local climate and usage patterns. If the garden has consistent, intense sunlight, you can opt for a smaller battery and panel. This lowers the cost. On the other hand, if you have many overcast days, you need a bigger system for reliable operation, which raises the price. Temperature also affects battery performance. For icy regions, I recommend specialized batteries or burying the battery box to maintain a more stable temperature.
In the future, solar panel efficiency will likely increase, and battery costs may come down further. This will make solar garden lighting more affordable for every landscape. Until that happens, we must compare the costs and benefits on a case-by-case basis. I see a gradual transition: homes with abundant sunlight or high electricity costs are usually first to adopt. Other places might wait until financial and technical factors improve.
The bottom line is that solar garden lights are already popular in many neighborhoods. Homeowners and gardeners see the advantages of energy independence and environmental benefits. With better designs and reliable engineering, it’s only a matter of time before more garden lights become solar.
Conclusion
Solar conversions blend garden beauty with modern efficiency. I believe we can enjoy beautiful landscape lighting while protecting our planet.