Installing solar flood lights is a practical and eco-friendly way to illuminate outdoor spaces while reducing energy costs. This step-by-step guide walks you through everything from choosing the right lights and tools to planning the installation location and maintaining your setup. Whether you’re lighting up a driveway, garden, or patio, this guide ensures you get the most out of your solar flood lights with clear, actionable advice.
Choosing the Right Solar Flood Lights
Selecting the perfect solar flood lights requires understanding your specific needs and knowing which features to prioritize. This guide will help you make an informed decision by breaking down the key considerations and features to look for.
Understanding Your Lighting Needs
- What areas need light?
Identify the spaces you want to illuminate, such as driveways, gardens, patios, or sheds. For example, a driveway may require brighter, wide-coverage lighting, while a garden path might need softer, focused light. - How bright does it need to be?
Brightness is measured in lumens. A small pathway may only need 500-1000 lumens, while larger areas like a backyard or parking lot might require 3000-5000 lumens for adequate illumination. - Consider motion detection:
Motion sensors are ideal for security purposes and energy efficiency. They activate the light only when movement is detected, conserving battery life and providing added safety.
Key Features to Look For
- Battery life:
Choose solar flood lights with long-lasting batteries that can provide illumination throughout the night. Lithium-ion batteries are a popular choice for their durability and efficiency. - Durability:
Ensure the lights are weatherproof by checking their IP (Ingress Protection) rating. For outdoor use, an IP65 rating or higher is recommended to withstand rain, dust, and extreme temperatures. - Solar panel size:
Larger solar panels capture more sunlight and charge the batteries faster, ensuring the lights are ready to perform even after cloudy days. - Brightness (Lumens):
The brightness of the light should match your needs. For example:- A 1000-lumen light is ideal for pathways or small patios.
- A 5000-lumen light is better suited for large areas like driveways or gardens.
Expert Insight
“Always check customer reviews for real-world performance,” advises Sarah Chen, a professional lighting designer. Reviews often reveal insights about battery life, brightness, and durability that may not be apparent from product descriptions.
By understanding your needs and focusing on these key features, you can confidently choose solar flood lights that deliver the performance and reliability you require.
Gathering Your Tools and Materials
Before installing your solar flood lights, ensure you have the right tools and materials on hand. Proper preparation will make the process smoother, safer, and more efficient. Below is a checklist of essential tools and optional items that can simplify the installation.
Essential Tools Checklist
- Drill and drill bits:
A drill is necessary for creating holes in walls, fences, or poles to mount the lights securely. Choose drill bits that match the material you’re working with, such as wood, concrete, or metal. - Screwdriver set:
A set of screwdrivers, including both flathead and Phillips head, will help you tighten screws during installation. - Ladder:
Use a sturdy ladder to safely reach elevated areas, such as walls or poles, where the lights will be mounted. - Measuring tape:
Measuring tape ensures accurate placement of the lights for optimal coverage and alignment. - Pencil or marker:
Mark the spots where you’ll drill or mount the lights to avoid mistakes during installation. - Safety glasses:
Protect your eyes from dust, debris, or accidental contact with tools while drilling or mounting.
Optional but Helpful Items
- Level:
A level ensures your lights are mounted straight, improving both aesthetics and functionality. Crooked lights can affect the direction of illumination. - Wire strippers (if needed for connections):
If your solar flood lights require any wiring adjustments, wire strippers will help you safely remove insulation from the wires. - Mounting brackets (if not included):
Some solar flood lights may not come with mounting brackets. Having extra brackets on hand can save time and ensure a secure installation.
By gathering these tools and materials in advance, you’ll streamline the installation process and ensure your solar flood lights are set up correctly.
Planning Your Installation Location
Choosing the right location for your solar flood lights is crucial for maximizing their performance and ensuring they meet your lighting needs. This section will guide you through finding the sunniest spot, determining the best mount height, and mapping out wiring if your lights have separate solar panels.
Finding the Sunniest Spot
- Solar panels need direct sunlight:
Position the solar panels in a location that receives the most sunlight throughout the day. South-facing areas are typically ideal in the northern hemisphere. - Avoid shade from trees or buildings:
Shade from nearby structures, trees, or other obstacles can significantly reduce the efficiency of your solar panels. Even partial shading can impact performance. - Statistic:
Solar panels can lose up to 30% efficiency when shaded, so it’s essential to choose a spot with minimal obstructions.
Determining the Best Mount Height
- Higher mounts offer wider coverage:
Mounting your lights higher allows them to illuminate a larger area, making them ideal for driveways, backyards, or patios. - Ensure easy access for maintenance:
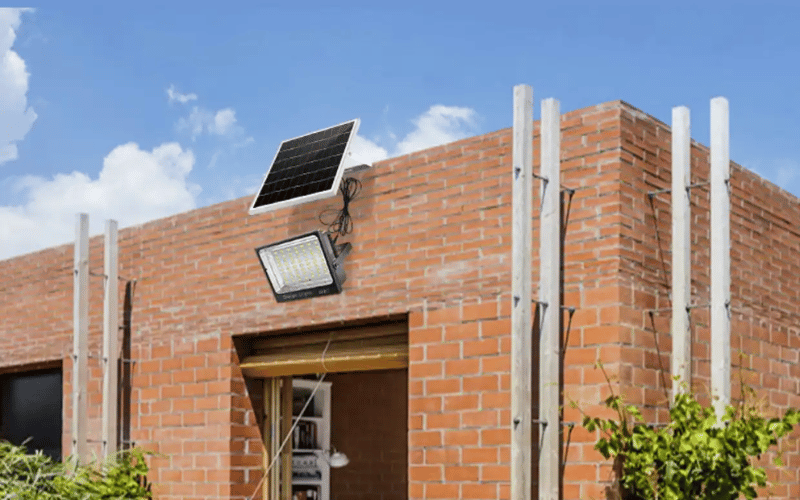
While higher mounts improve coverage, make sure the lights are still accessible for cleaning, battery replacement, or adjustments. - Real-world example:
Mounting solar flood lights on a garage wall can effectively cover both the driveway and the adjacent yard, providing ample illumination for safety and convenience.
Mapping Out Wiring (If Applicable)
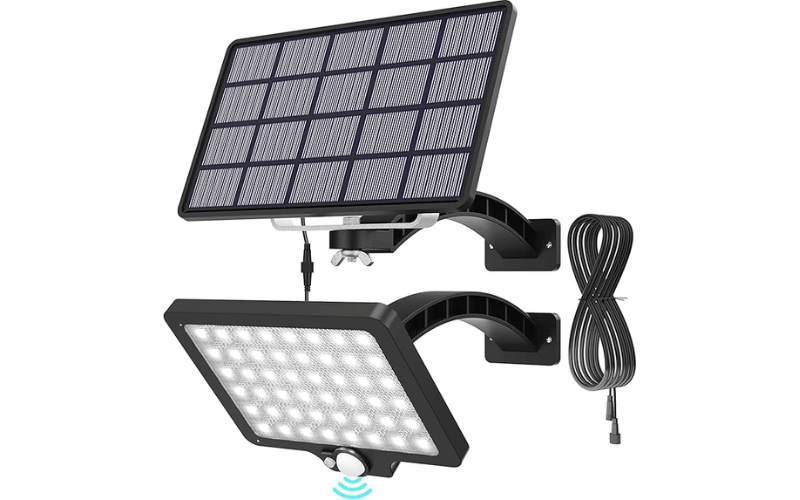
- Some lights have separate panels:
If your solar flood lights come with a detached solar panel, plan where both the light and the panel will be installed. Ensure the panel is in a sunny spot while the light is positioned for optimal coverage. - Plan the route for the cable:
Map out a clear and secure path for the cable connecting the light to the solar panel. Avoid areas where the cable could be a tripping hazard or exposed to damage. - Ensure the cable is protected:
Use cable clips or conduits to secure the wiring and protect it from weather, animals, or accidental damage. This will extend the lifespan of your setup and maintain its efficiency.
By carefully planning your installation location, you can ensure your solar flood lights perform at their best and provide reliable illumination for your outdoor spaces.
Step-by-Step Installation Process
Installing solar flood lights is straightforward when you follow a clear, step-by-step process. This guide will walk you through mounting the solar panel, installing the light fixture, connecting the components, and testing the setup to ensure everything works perfectly.
Mounting the Solar Panel
- Secure the mounting bracket firmly:
Use screws to attach the mounting bracket to a stable surface, such as a wall, pole, or fence. Ensure the bracket is level and tightly secured to prevent movement. - Attach the solar panel to the bracket:
Once the bracket is in place, fix the solar panel onto it. Most panels come with adjustable mounts, allowing you to position them for maximum sunlight exposure. - Angle the panel towards the sun:
For optimal performance, angle the panel towards the sun. In the Northern Hemisphere, a south-facing direction works best to capture the most sunlight throughout the day.
Installing the Flood Light Fixture
- Choose the mounting location for the light:
Select a spot that provides the best coverage for your lighting needs, such as a driveway, patio, or garden. Ensure the location is within the cable’s reach of the solar panel. - Drill pilot holes if needed:
Mark the mounting points with a pencil or marker, then drill pilot holes to make it easier to secure the screws. This step is especially important for harder surfaces like concrete or brick. - Secure the light fixture with screws:
Attach the light fixture to the mounting surface using screws. Tighten them firmly to ensure the light stays in place, even in windy conditions.
Connecting the Components
- Connect the panel cable to the light fixture:
Plug the cable from the solar panel into the light fixture. Ensure the connection is secure to avoid interruptions in power. - Follow the manufacturer’s instructions carefully:
Each product may have specific steps for connecting components. Refer to the user manual to avoid mistakes and ensure proper functionality. - Actionable takeaway:
Test the connections before tightening everything fully. This ensures the system works correctly and saves time if adjustments are needed.
Testing the Light
- Cover the solar panel to simulate darkness:
Use a cloth or your hand to block sunlight from reaching the panel. This should trigger the light to turn on, confirming the system is working. - Check if the light turns on:
If the light doesn’t activate, double-check the connections and ensure the panel is positioned correctly. - Allow the panel to charge fully before initial use:
Let the solar panel charge in direct sunlight for a full day before relying on the light for nighttime use. This ensures the battery starts with maximum capacity.
By following these steps, you can install your solar flood lights efficiently and ensure they perform reliably for your outdoor lighting needs.
Post-Installation and Maintenance
Proper post-installation care and regular maintenance ensure your solar flood lights perform efficiently and last for years. This section covers initial setup, cleaning routines, and battery care to keep your lights in top condition.
Initial Charging and Operation
- Let the light charge for a full day in the sun:
After installation, allow the solar panel to absorb sunlight for an entire day before using the light. This ensures the battery reaches its full capacity for optimal performance. - Monitor its performance over the first few nights:
Observe how the light functions during the initial nights. Check for consistent brightness, proper motion detection (if applicable), and sufficient battery life. If issues arise, adjust the panel’s angle or inspect the connections.
Regular Cleaning
- Wipe the solar panel clean with a damp cloth:
Dust, dirt, and debris can accumulate on the solar panel, reducing its ability to capture sunlight. Use a soft, damp cloth to gently clean the surface without scratching it. - Remove dust, dirt, and debris:
Pay attention to areas where grime tends to build up, such as the edges of the panel or around the light fixture. Keeping these areas clean ensures maximum efficiency. - Frequency:
Aim to clean the solar panel at least once a month. In dusty or rainy environments, you may need to clean it more frequently to maintain performance.
Checking Connections and Batteries
- Periodically inspect wires for damage:
Examine the cables connecting the solar panel to the light fixture. Look for signs of wear, fraying, or damage caused by weather or animals. Replace damaged wires promptly to avoid interruptions. - Ensure battery compartments are clean and dry:
Open the battery compartment occasionally to check for moisture or corrosion. A clean, dry compartment helps extend the life of the batteries and prevents malfunctions. - Expert Tip:
Replace the batteries every 2-3 years for optimal performance. High-quality rechargeable batteries ensure the light remains bright and reliable over time.
By following these maintenance steps, you can keep your solar flood lights operating efficiently and enjoy consistent illumination for your outdoor spaces.
Frequently Asked Questions
Q: How do I choose the right solar flood lights for my needs?
A: Start by identifying the areas you want to illuminate, such as driveways, gardens, or patios. Consider the brightness level (measured in lumens) required for the space. For example, small pathways may need 1000 lumens, while larger areas like backyards may require 3000-5000 lumens. Look for features like motion detection, long battery life, and weatherproof durability to ensure the lights meet your needs.
Q: What tools do I need to install solar flood lights?
A: You’ll need a drill with drill bits, a screwdriver set, a ladder, measuring tape, a pencil or marker, and safety glasses. Optional tools like a level, wire strippers, and extra mounting brackets can make the process easier and more precise.
Q: Where should I install the solar panel for maximum efficiency?
A: Install the solar panel in a location that receives direct sunlight throughout the day. South-facing areas work best in the Northern Hemisphere. Avoid placing the panel in shaded spots, as even partial shade can reduce efficiency by up to 30%.
Q: How high should I mount my solar flood lights?
A: Mount the lights high enough to provide wide coverage for the area you want to illuminate. For example, mounting them on a garage wall can cover both a driveway and a yard. Ensure the lights are still accessible for maintenance, such as cleaning or battery replacement.
Q: How do I connect the solar panel to the light fixture?
A: Plug the cable from the solar panel into the light fixture, following the manufacturer’s instructions. Secure the connection to prevent interruptions in power. Test the setup before tightening everything to ensure it works correctly.
Q: How do I maintain my solar flood lights?
A: Clean the solar panel monthly with a damp cloth to remove dust and debris. Inspect the wires for damage and ensure the battery compartment stays clean and dry. Replace the batteries every 2-3 years to maintain optimal performance.
Q: What should I do if my solar flood lights don’t turn on?
A: First, check the connections between the solar panel and the light fixture. Ensure the panel is positioned to receive direct sunlight and has charged for a full day. If the issue persists, inspect the battery compartment for corrosion or damage and replace the batteries if needed.
Q: Can I install solar flood lights without professional help?
A: Yes, most solar flood lights are designed for easy DIY installation. With the right tools and clear instructions, you can securely mount the lights and solar panel yourself. However, if you’re unsure about wiring or mounting on certain surfaces, consult a professional for assistance.
Concluding Summary
By carefully selecting the right solar flood lights, preparing the necessary tools, and following a detailed installation process, you can achieve reliable and efficient outdoor lighting. Regular maintenance, such as cleaning the solar panels and checking connections, ensures long-term performance and durability. With these steps, your solar flood lights will provide consistent illumination while saving energy and supporting sustainability.